The Balloon Decorating Strip
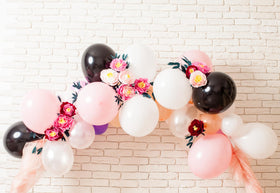
You’ve seen the gorgeous pictures on Instagram – beautiful balloon arches, garlands and clusters set up for a special bridal shower, baby shower or birthday party. I am sure that many of you have wondered where and how you would get a decorator to recreate these designs for your upcoming party.
For some of you, hiring a decorator is just out of your budget. For others, you are very crafty and love to DIY everything. Enter the balloon decorating strip. This length of magical goodness makes it very easy to create a balloon garland/arch or cluster at home. I promise, you do not need any prior craft or balloon decorating experience to use the balloon decorating strip.
The balloon decorating strip is super easy to use. Don’t believe me? Order the Shimmer and Confetti Unicorn Balloon Garland Kit which comes with a complementary 15ft balloon decorating strip and try it out. Here are a few instructions to guide you as you create your very own balloon garland, arch or cluster.
- Leave out a few inflated balloons. You will use them later to fill up your garland.
- Cut your balloon decorating strip to your desired length.
- Leave some extra length on the ends for fastening the decoration once complete.
- Two hole sizes are provided on the balloon decorating strip. The smaller for your 5” balloons and the larger for your 10 and 12” balloons.
- You may not need to use all holes provided. The strip holds up to 12 balloons per foot.
Now for the fun part…
- Pinch the lip of one balloon together and pull the knot in the balloon neck through the hole.
- Repeat this for all your balloons.
- Attach balloons to one or both sides of the strip to create an even cluster. Skip a hole if balloons are too tight.
- Once you are done, use painter’s tape or command hooks to attach the garland to the wall.
- Use the leftover balloons to fill up any holes and give your garland a fuller look.
- Finally, step in front of your garland and take gorgeous pictures. Do not forget to tag us on Instagram - @shimmerandconfetti – for a chance to win free products.


Leave a comment